Improving our user documentation
By Mar Batlle onMar Batlle is a Clinical Bioinformatician. In this post, she discusses how the bioinformatics team aims to build a web experience for their docs that grows organically with Genomics England's services.
Documentation. The backbone of our services, but always challenging to keep up-to-date as our applications improve and evolve.
Our main goal with this effort is to make everyone’s life easier. It will help our users get started using our applications and finding answers to their questions. It will also be helpful for our support team because it will make explaining difficult actions a lot easier.
What are our requirements? The documentation should be:
- Accessible – we need to develop a single source of information.
- Consistent but adaptable – the new docs should have a uniform style while being easy to customize.
- Straightforward – it must be intuitive to manage, by either developers or people with other backgrounds.
- Interactive – the site should be able to host interactive content, such as images, videos, and downloadable resources.
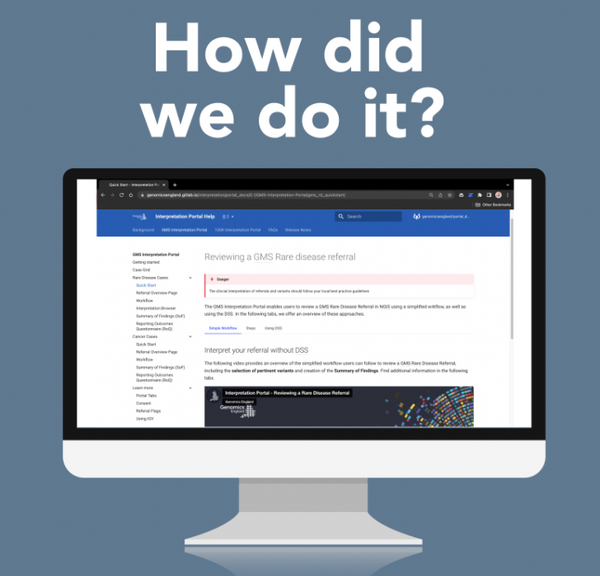
After weighing our options, we decided on following the Docs as Code system. The same tools, processes, and workflows used to write code should also write documentation. Docs as Code follow; writing in plain text files (usually markdown), using version control such as Git, building the web output using static site generators, and managing review cycles. Some of our new docs include the Interpretation Portal and the Research Environment Help website.
In our case, we found that the best approach is to build a static HTML site using MkDocs, hosting it on GitLab, and using Mike to set up versioning.
Prerequisites
To follow these steps, you should have installed an up-to-date version of Homebrew (we're using v.3.5.2), Python (we're using v.3.8.5), and Pip (we're using v.20.2.4).
Installing MkDocs, Material Theme, Mike, and some Plugins
            # Start by installing mkdocs
pip install mkdocs

# Install the material theme
pip install mkdocs-material

# Install Plugins
pip install mkdocs-git-revision-date-plugin
pip install mkdocs-video

# Install Mike
pip install mike
Assembling your repository
We’ll show you how to work on an existing GitLab repository, but alternately, you can create a new one and use GitHub if it fits better in your project. After deciding the location of your Git repository in your local file system, we can build our documentation.
            # Choose a location in your terminal
$ cd /path/to/your/folder

# Clone your target repository
$ git clone https://gitlab.com/username/your-repo.git

# Initiate the documentation
$ cd your-repo
$ mkdocs new .

# Review your initial project
$ tree your-repo
.
├── docs
│   └── index.md
└── mkdocs.yml
At this point, the initial project has been created. Your directory will contain a configuration file named mkdocs.yml, and a folder named docs. This folder will contain our markdown files, but for now, just contains a single documentation page, named index.md.
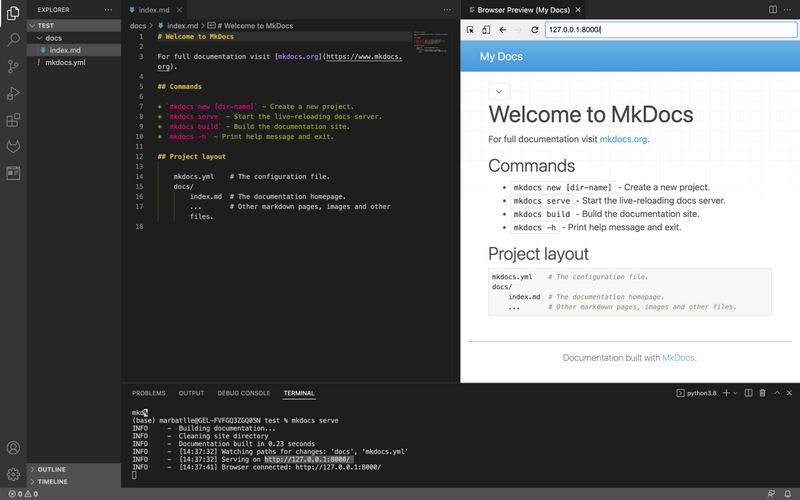
MkDocs lets you preview your documentation as you work on it. Make sure you are in the same directory as the mkdocs.yml file, and use de mkdocs serve command.
            $ mkdocs serve
INFO     -  Building documentation...
INFO     -  Cleaning site directory
INFO     -  Documentation built in 0.23 seconds
INFO     -  [14:37:32] Serving on http://127.0.0.1:8000/
Looking to make the editing process easier? There are many powerful IDE that will help you manage your documentation. The most popular one within our team is Visual Studio Code. It’s handy when it comes to seeing an overview of all your files, editing the markdown files efficiently, and working on the built-in terminal… all simultaneously! One of our tips is using the Browser Preview extension to view your website come to life!
Add and edit your content
This server will automatically rebuild as you edit the files. You can get started by modifying the docs/index.md document and saving your changes. Also, try and change the site_name setting to Help Page in the configuration file mkdocs.yml.
We add new content by creating markdown files. Remember that all docs must live under the docs directory. To include the pages in the navigation headers, add a new link under nav in the main mkdocs.yml file.
            site_name: Help Page
site_url: https://username.gitlab.io/your-repo
nav:
    - Home: index.md
    - About: about.md
At this point, you can populate the pages with your content. For example, we added this useful video for our users.
The voiceover in the video was created using AI on Play.ht.
Personalizing the site
The default themes in MkDocs are mkdocs and readthedocs. It is possible to use other themes developed by other third parties or develop your own theme. We use the Material theme.
            site_name: Help Page
site_url: https://username.gitlab.io/your-repo
nav:
    - Home: index.md
    - About: about.md
theme: material
To further personalize your site, you can change the color, the font, the logo, and icons, configure searches, configure Google Analytics, etc.
Deploying the site
Once your site is looking good, you're ready to publish the first draft of the documentation.
The mike extension natively supports GitHub pages, so you need a couple of tweaks. To solve this, we'll create a gh-pages branch and add and commit a .gitlab-ci.yml file.
            image: alpine:3.13
pages:
  stage: deploy
  only:
    - gh-pages
  script:
    - mkdir .public
    - cp -r * .public
    - mv .public public
    - ls
  artifacts:
    paths:
      - public
Locally, after the updates to the docs are made, run the following command on the main branch.
            # Build the documentation
$ mike deploy 0.1 -p
This creates a new directory, named site. It includes the HTML files that give shape to your static website (don't touch these). Your site is now online!
Why use mike?
Mike allows multiple versions of your project documentation to be published and deployed. This will render a version selector in the header next to the title of your project.
When deploying a new version, older versions of your documentation remain untouched. This means you never have to worry about breaking changes in MkDocs.
It's optimized around putting your docs in a <major>.<minor> directory, making it easy to make permalinks to whatever version of the documentation you want to direct people to.
Managing the site
To handle these new docs under the Genomics England Quality Management System (GEQMS) and maintain the ISO standards, we have created an SOP delimiting how to create and update new docs. These standards include the creation of internal documentation for each of the end-user sites, where we keep a detailed record of version control and review cycles.
Moving forward
Please watch this space for future updates on our documentation sites. You can find more information about bioinformatics at Genomics England here.